This guide offers a comprehensive step-by-step approach to troubleshooting common treadmill issues that may arise in a home gym setting. It covers various problems, such as power failures, belt misalignment, and unusual noises, providing practical solutions to help you diagnose and fix these issues effectively. By following the outlined steps, you can quickly resolve problems and ensure your treadmill remains in optimal working condition, allowing you to maintain your fitness routine without interruption.


Treadmill Troubleshooting: A Diagnostic Guide
Check the Power Source
Check that the treadmill is plugged in securely. Firmly push the plug into the outlet to ensure a solid connection. Inspect the power cord for any visible damage such as fraying or cuts. If you notice any issues, replace the power cord before using the treadmill to prevent further complications.
Test the power outlet by plugging in another device, such as a lamp or phone charger. If the second device does not work, the outlet may be faulty. In this case, try a different outlet in the room or reset the circuit breaker if necessary. Ensure that the power source is reliable before proceeding with your treadmill workout.

Inspect the Safety Key
- Inspect the safety key on your treadmill. Most treadmills require this crucial component to operate correctly.
- Ensure the safety key is securely in place. It should fit snugly into its designated slot without any obstruction.
- Check for any visible damage or wear on the safety key. Look for cracks, bends, or other signs of deterioration.
- If the safety key is missing or damaged, obtain a replacement immediately. Consult your treadmill’s manual or manufacturer’s website for the correct part number.
- Insert the new safety key firmly into the slot and verify that it is seated properly.
- Test the treadmill by pressing the start button to ensure it powers on smoothly.
- Regularly check the condition of the safety key during routine maintenance to avoid any operational issues.
Examine the Belt Alignment
Examine the treadmill belt alignment regularly to prevent noise and potential damage. First, stand beside the treadmill and observe the belt’s position. Check if the belt is centered on the deck; it should be evenly spaced on both sides. If the belt is misaligned, follow these steps:
- Locate the adjustment bolts, usually found at the rear of the treadmill.
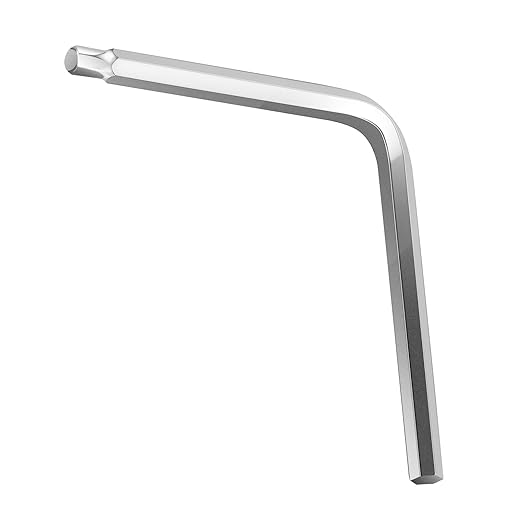
- Use an Allen wrench or the appropriate tool to turn the bolt on the side where the belt is drifting.
- Turn the bolt clockwise to move the belt toward that side and counterclockwise to shift it away.
- Make small adjustments, then run the treadmill at a low speed and reassess the alignment.
Inspect the belt for signs of wear, such as fraying edges or cracks. If you notice any damage, replacement is necessary for safe operation. Regularly check the tension of the belt; it should not feel too tight or too loose. Adjust tension if needed, following the manufacturer’s guidelines.
Check the Console Settings
Verify that the console is configured with the correct settings. Navigate to the settings menu and check for any locked modes that may be preventing normal operation. If any modes are locked, unlock them to ensure full functionality.
Restart the machine if issues persist. Power off the console completely, wait for a few seconds, and then turn it back on. This simple action can often clear minor glitches and restore the console to optimal performance. After restarting, recheck the settings to confirm everything is set correctly.
Lubricate the Belt
Ensure proper performance by regularly lubricating the treadmill belt. A dry belt increases friction, which can lead to wear and tear, affecting the treadmill’s efficiency and your workout. Follow these steps to apply lubricant effectively:
- Check the manufacturer’s recommendations for the type and frequency of lubricant to use. Most treadmills require silicone-based lubricants, but always verify with your specific model.
- Unplug the treadmill to ensure safety during the lubrication process.
- Lift the belt slightly on one side to expose the treadmill deck.
- Apply the lubricant evenly along the deck under the belt, typically in a zigzag pattern. Aim for about one to two ounces, depending on the manufacturer’s instructions.
- Spread the lubricant across the belt’s surface by manually moving the belt for a few minutes, ensuring the lubricant penetrates evenly.
- Wipe any excess lubricant from the belt’s edge using a clean cloth to prevent slipping during use.
By maintaining a well-lubricated belt, you enhance the treadmill’s performance and longevity, making your workouts more effective and enjoyable.
Consult the Manual for Error Codes
When your treadmill displays an error code, immediately consult the user manual for specific troubleshooting steps related to that code. Each error code is designed to indicate a specific issue with the treadmill, helping you diagnose the problem more effectively. Look for a section in the manual that outlines error codes and their meanings.
- Identify the error code on your treadmill display; it could be something like “E01” or “E02.”
- Locate the corresponding section in the user manual that addresses this error code.
- Follow the troubleshooting steps provided for that code, which may include checking connections, resetting the machine, or performing maintenance tasks.
For example, if you see an “E01” code, the manual might instruct you to check the safety key, ensuring it is properly inserted. If the error is “E02,” you may need to inspect the treadmill’s motor and wiring for any visible damage. By following these steps, you can often resolve the issue quickly and get back to your workout routine.
Final Thoughts on Troubleshooting
In conclusion, troubleshooting common treadmill issues at home is both manageable and essential for maintaining optimal performance. By conducting regular maintenance and addressing minor problems promptly, you can extend the lifespan of your equipment and ensure a smoother, more enjoyable workout experience. Remember, a well-cared-for treadmill not only enhances your fitness journey but also saves you time and money in the long run. Happy exercising!
Hey, great guide! Just a tip: when checking the power source, make sure to look for any loose cords or tripped breakers. My NordicTrack treadmill wouldn’t start, and it turned out the outlet was overloaded. Simple fix!
I tried inspecting the safety key, but I don’t really know what to look for. My ProForm treadmill is still not working after that. Any advice on what could be wrong? Should I replace the key?
If the safety key seems to be intact but the treadmill still won’t start, it might be worth trying a replacement just to rule it out. Sometimes they can wear down over time even if they look fine. You could also check the key slot for any dirt or debris.
I had a nightmare with the belt alignment on my Sole F63. I didn’t realize it was off until I started hearing a weird noise. Now I’m on top of it! Definitely recommend checking that regularly!
Glad you’ve got it sorted now! Belt alignment is crucial for a smooth workout. It saves wear on the machine and keeps your workout safe. Thanks for sharing your experience!
I’m looking to buy a treadmill, any recommendations? I want something sturdy and reliable, but not too pricey. I’ve heard good things about the Horizon T101, but not sure if it’s worth it?
The Horizon T101 is a solid choice! It’s known for durability and has great features for the price. If you’re considering something else, check out the Nautilus T618 too. It’s a bit pricier, but it’s got excellent reviews for performance.
Thanks for your input! It’s always the little things that can cause big headaches. Checking cords and outlets is definitely a good habit to get into.